
Butter isn’t exactly one of “the recipes that are no longer in vogue, but were familiar to our grandparents, or even our great-great-grandparents and beyond.” We’ve never really stopped eating butter, though people have cut back over the years for health reasons. Butter itself, though, is still found in every grocery store.
The thing that has been nearly forgotten, though, is how to make it. This was a skill that nearly every housewife once had, and now we let dairies do it for us. It’s more convenient that way, but some would say that we’ve lost quite a bit of flavor that way as well. Some of us had the experience of shaking a jar of heavy cream to make butter in school or at Girl Scouts, and others have accidentally made butter when trying to whip cream, but most Americans today have probably never seen butter made.
The butter we buy in the grocery store is also different from traditional farm butter. It’s “sweet cream” butter, made from fresh, sweet cream. Sounds good, right? Well, it’s pretty good, but it turns out that traditional butter is not made from sweet cream at all. It’s made from sour cream. And it tastes much better and more “buttery” than sweet cream butter.
Twenty-Fifth Annual Report of the Michigan Dairymen’s Association, 1909.
Notice the terminology Dr. Rahn uses in the image above: “ripening the cream.” To our modern mind, letting cream go sour is a bad thing. But done right, it’s “ripening” the cream, making it “fit for churning,” as an old cookbook I read puts it. Notice also the perspective on sweet cream butter: “the unusual flat taste and its bad keeping qualities.” My, how tastes have changed.
Traditionally, cream for butter was skimmed from the milk, and then kept for a while until it had soured and become fit for churning. Natural bacteria in the cream and the environment would cause the cream to clabber, to become nicely soured. Modern milk is pasteurized and homogenized, so it doesn’t separate into cream and milk, and it doesn’t contain the “good bacteria” needed to clabber. Left alone, it will just sour in a bad way instead.
The separation problem isn’t too bad. We can buy heavy cream in cartons, separately. (Try to find cream that isn’t ultra-pasteurized, and contains only milk and cream in the ingredients list. No carrageenan, etc.) The bacteria problem is also solvable. We need to put the good bacteria back into the cream, and we do this by either buying a commercial starter culture, or just some buttermilk that contains live cultures. The buttermilk is probably at your grocery store.
So here’s what you need:
- 1 quart of heavy cream (not ultra-pasteurized, no extra ingredients)
My milkman only delivers cream in pints, so I just get two pints at a time. - 1/3 cup of buttermilk with live cultures
You can freeze extra buttermilk in ice cube trays so you don’t have to buy a new carton every few weeks just to make a little butter. Three cubes are about 1/3 cup. I haven’t tried the frozen buttermilk trick yet, though — I’m freezing some now for next time. - 1 spotlessly clean glass or metal bowl with a cover
And here’s what you do:
Pour the cream and buttermilk together in the bowl and stir gently to mix. Cover the bowl and put in a warm place overnight. (My last batch needed to ripen for 18 hours.) By warm, I mean 70-80F. As the time approaches, it should smell good — not like rotting milk, but like delicious crème fraîche. Which is what you are making at this point. When it’s ready, it will thicken to something like sour cream thickness (of course!). It will smell like heaven and taste just as good. Now bring the cream to a temperature of around 60F.
At this point, you could churn it. But since you probably don’t have a churn, a stand mixer will do. I have a KitchenAid, like the one Kristen posted about recently. (Mine is a green Epicurean model.) I put the cream into the bowl, and stir at medium low speed with the paddle attachment. Do not use high speed, because if you do, when the cream turns to butter, you will have a mess all over your walls. The slow stirring will do the trick. Watch it. If you have 60F cream, and it’s ripened nicely, it may become butter quickly. (5 minutes for my last batch.) But it could take quite a bit longer, too. Watch and you will see it become creamier, creamier, a bit grainy… sploosh! Butter grains floating in buttermilk.
When the grains are about rice-sized, drain the buttermilk (you can cook with it, or use it as starter for another batch), and rinse the butter under cold running water, working the butter by kneading it, squeezing and pressing and folding, and rinsing until the water runs clear. If you don’t do this, your butter will go rancid quickly.
Then keep working the butter to get as much water out of it as you can. This is when you can add salt, which helps it to keep longer.
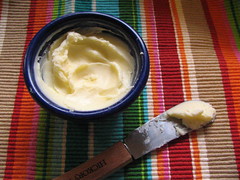
You should have about a pound of butter after you are done working it. I divide it into fourths and freeze all but one, which is the one we will use right away. I put that one in a cloche de beurre, which is a little crock that keeps the butter cool but spreadable.
The cultured butter will have a stronger butter flavor than you are used to, and you will want to spread it on everything. Be warned.