More Mexican Cookery for American Homes

Don’t worry, parts 2 and 3 of “Oh, Mapleine!” are coming soon. But I found a couple more things that I thought would be of interest, and didn’t want to wait to post them.

Last year I posted about the cookbook Mexican Cookery for American Homes (1936 edition), and later tried a recipe from the book for “Enchiladas, Mexican Style” that turned out to be excellent.

Flickr user Eudaemonius has posted a complete version of the 1932 edition of the same cookbook. It is much more colorful and flamboyant in design than the 1936 copy I have—mine, perhaps, reflects a bit more Depression-era austerity. It doesn’t include the bilingual titles that the later edition contained. The 1932 copy also does not contain all of the recipes. It may be shorter (I can’t find mine to double-check at the moment), but it definitely doesn’t include the stacked enchiladas I made from the other book. It does have recipes such as “Mexican Rarebit,” “Chili and Rice Cones,” and “Mexican Chop Suey.”

Yes, you read that correctly. Here you go!

MEXICAN CHOP SUEY

  • 4 T. butter
  • 2 small onions, chopped
  • 3 pieces celery, chopped
  • 1 green pepper, chopped
  • 1 lb. hamburger
  • 1 No. 1 can tomato puree
  • 1 t. salt
  • 1 No. 2 can Gebhardt's Spaghetti

Cook onions, celery and green pepper in butter until tender; add hamburger and continue cooking until partially done.

Add tomato puree, salt and simmer until meat is tender.

Turn into a greased casserole, cover with contents of No. 2 can Gebhardt's Spaghetti and Chili and bake in moderate oven 20 min.

Mexican? Probably not so much. But it reminds me of some of the casseroles my mom cooked in the 1970s.

One other site I wanted to point you to is La Cocina Historica, a project of the University of Texas at San Antonio Special Collections Department. The blog features recipes from the university’s Mexican Cookbook Collection. They have more than 900 Mexican, Texan, and Southwestern cookbooks in Spanish and English, dating from 1789-2010. The collection includes printed cookbooks and also handwritten manuscripts. The bloggers (multiple people contribute to the site) try out the recipes and describe how they turned out.

I think “Huevos al Estilo Español” (1908) sounds lovely, but that’s probably because it’s pretty close to my breakfast burrito recipe already. I’d just mix up that filling and wrap it in tortillas.

(Editorial note: This post was changed slightly on May 17, 2011 to include new recipe formatting to be compatible with Google’s Recipe View system.)

The Enchiladas, Mexican Style experiment

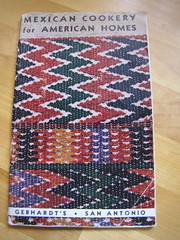
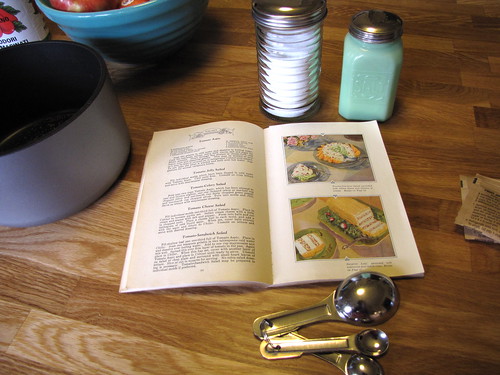
When flipping through Mexican Cookery for American Homes (1936) last week looking for a recipe to try that we would also be willing to eat for dinner, I saw a recipe for Enchiladas, Mexican Style. “Sounds good,” said Jason. “Make that.”

Here is the recipe as it is in the book:

ENCHILADAS, Mexican Style

18 tortillas 1 c. grated cheese
1/2 c. fat 1 c. chopped onion
Chili Sauce (recipe p. 36) 6 eggs, fried
Salt to taste

If tortillas are cold, heat in hot fat until they are softened and are golden brown in color. In a saucepan, heat the chili sauce. Dip the hot tortillas in the hot chili sauce and remove to plate; sprinkle each with cheese and finely chopped onion. Serve in stacks of three, topped with a fried egg and two or three tablespoons of Chili Sauce.

Wait, what? Stacked, flat enchiladas? I had never heard of such a thing. When I’ve made enchiladas before, they have always been filled, rolled, and baked in chili sauce. (Yum, I might add.) This odd “flat enchilada” piqued my interest.

As it turns out, is not exactly a resurrected recipe—flat enchiladas are still commonly made in New Mexico, Sonora, and a few other places. In New Mexico, it’s considered a local specialty. Up here in the Seattle area, though, enchiladas are usually rolled, at least in the restaurants I’ve visited.

Barry Popik’s website, The Big Apple, discusses the history of the flat or stacked enchilada, giving several recipes including a recent one by Bobby Flay that is fairly similar to our 1936 recipe, and one dating back to 1950.

The flat enchilada can be found earlier than 1950, however. Here it is in “A New Mexico Supper,” American Cookery, October, 1921:

Las Enchiladas, for instance, are unlike anything else under the sun. You may follow, if you like, the fascinating process of concoction of this piece de resistance of your meal. The senora is frying tortillas, the corn pancake which is the foundation of the enchilada.

“From a snowy mass of corn meal dough she pinches a ball which she spins and pats between her plump hands into a thin wafer about six inches in diameter. She browns this on top of the stove, rotating and turning it with her moistened palm. When three tortillas have been beautifully browned they are next dropped into a kettle of boiling fat where they bubble and turn until the real building process begins.

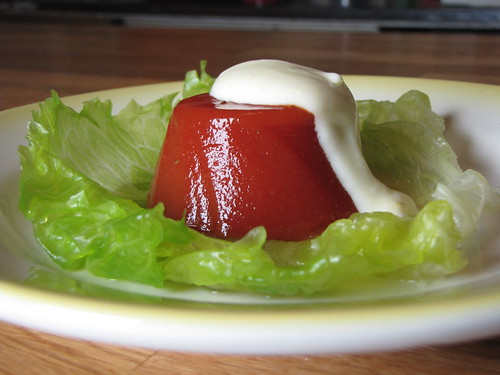
“First a tortilla in the center of a plate. Then a flood of rich red chile sauce from a near-by kettle, a layer of grated cheese, another tortilla, more chile and more cheese sprinkled between in layer-cake fashion, and the whole topped with a high crown of chopped onions in which nestles an egg, which has been broken for a minute into the hot lard. An artistic and cooling garnish of lettuce—and behold an enchilada!”

The flat “Mexican Style” enchilada recipe in Mexican Cookery for American Homes is on the same page as a recipe labeled “American Style.” The “American” version is the rolled style: tortillas stuffed with hot chili from a can and then covered with chili as well, then sprinkled with grated cheese and placed in the oven just long enough to melt the cheese.

The “Mexican Style” sounds much more appealing, so I went with that. The first step was to turn to the Chili Sauce recipe on page 36.

SALSA DE CHILI
(Chili Sauce)

2 T. butter 2 T. flour
1 onion, chopped 1/2 t. salt
1 green pepper, chopped 1 T. Gebhardt’s Chili Powder
1 clove of garlic, minced 1 c. tomatoes
1 c. meat stock or water

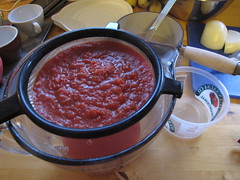
Cook onion, green pepper and garlic in the butter until soft; add flour, salt and Gebhardt’s Chili Powder and stir until smooth. Add tomatoes and meat stock or water. Cook until thickened and smooth. Strain if desired.

Cooking enchiladas from a 1936 recipe

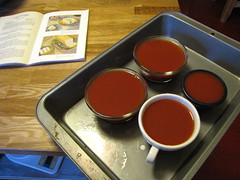
This is reasonably straightforward. The only changes I made to the recipe were using chili powder from Penzeys (their Medium Hot) instead of Gebhardt’s, and using vegetable stock instead of beef stock or water. I made the full recipe.

Chile sauce

The chili sauce ready to go, it was time to make the enchiladas. I was only making one stack because Jason is currently not eating tortillas — he was going to use the chili sauce to make himself some huevos rancheros instead. The original recipe serves six, so I reduced the quantities as appropriate.

I heated up olive oil in a pan, and when it was hot, dipped each tortilla in the oil for about 5 seconds on each side, then dipped it in the sauce, then laid it out on the plate. The one problem I tended to have here was that I couldn’t stack neatly, since the tortillas kept wanting to fold in on themselves while I was trying to get them on the plate.

Neatly or not, I got each tortilla, now coated in saucy goodness, onto the plate, where Jason sprinkled cheese and onions on top of each layer.

Enchiladas from a 1936 recipe

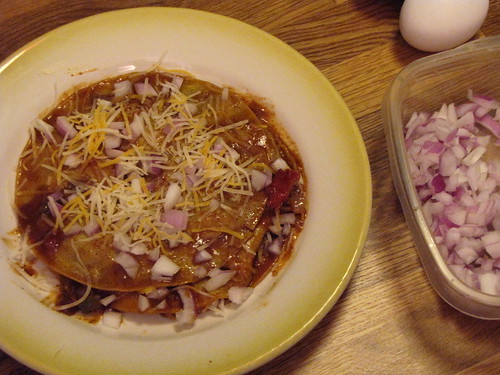
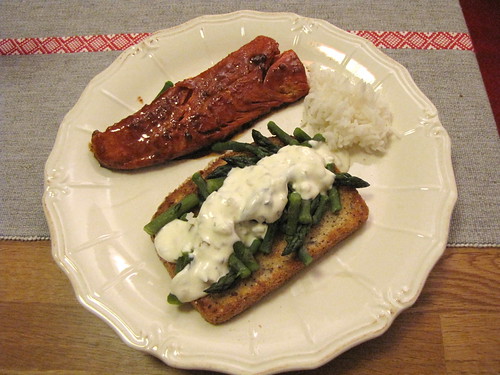
I quickly fried an egg sunny-side up, and placed it on top of the stack, then sprinkled on some more cheese, onions, and a few spoonfuls of chili sauce, and a dab of sour cream. (Unfortunately, I don’t have a good photo of the finished eggy version.)

Verdict

This was excellent. I don’t think it is necessarily the healthiest thing I’ve ever cooked, what with the quick-fried tortillas and the egg and the cheese, but darned if it wasn’t one of the tastiest. I would cook and eat this again any time.

The chili sauce had a lot to do with the success of this recipe. I did let it thicken and reduce just a bit more than I should have, I think, but it was delicious. I chose not to strain it, so it was a bit chunky, but that wasn’t a problem at all. It wasn’t outrageously hot chili sauce, but it wasn’t exactly tame, either — you would take a taste and think “this isn’t hot at all, just flavorful,” and then a minute later the burn would hit you. And it was a good burn, not the kind of macho “more pain than flavor” burn you get from a lot of spicy foods these days. Of course, it might just be that the chili powder we used is really tasty.

We both felt that the sauce needed a bit of salt, but that wasn’t a big deal. Some of the information I found online about Gebhardt’s chili powder indicated that it might be as much as 40% salt, which would explain why our version that didn’t use Gebhardt’s needed some salt — the Penzeys powder we used contains only Ancho chili pepper, red pepper, cumin, garlic and oregano, but not any salt.

I can’t speak for authenticity or whether this really is “Mexican Style.” What I do know is that it’s pretty good, and I think I’ll introduce it to a few Seattle friends who may never have enjoyed a stacked enchilada before.

We had some leftover chili sauce and onions, and used that to resurrect another recipe on the next day. Stay tuned for a post about that one.

Mexican Cookery for American Homes

Last week I acquired a copy of a small cookbook, Mexican Cookery for American Homes, published in 1936 by the Gebhardt Chili Powder Company of San Antonio, Texas. This was an updated version of a 1923 cookbook also published by Gebhardt. (In 1908, Gebhardt published another book called Mexican Cooking; there’s a reprint now available.)

In the early 20th century, Mexican food has become a staple of the American diet, though it’s been Americanized to some extent. It’s no longer exotic in any way. We all know enchiladas, tacos, and tamales. In 1936, however, Mexican food could still be a bit more of an unusual treat unless you lived in areas such as the Southwest U.S.. The cookbook’s foreword alludes to this when it says “Mexican foods are as interesting and appetizing as they are exotic” and stresses that “Americanized recipes are also included.”

Indeed they are. Along with the enchiladas and tacos, the book includes Sopa a la Creole (Creole Gumbo), Torta de Carne Enchilada (Chili Meat Loaf), Rarebit a la Mexicana (three versions of Mexican Rarebit — basically, Welsh Rabbit with with such additions as chili powder, corn, and Gebhardt’s Deviled Sandwich Spread), Huevos Endiablados en Aspic (Deviled Eggs in Aspic) and Chili Scrapple.

My favorite recipe, for its sheer silliness, is the recipe for Gebhardt’s Chili con Carne:

GEBHARDT’S CHILI CON CARNE
(Gebhardt’s Chili with Meat)

No. 2 can Gebhardt’s Chili con Carne

Place the can of Gebhardt’s Chili con Carne, either plain or with beans, in a saucepan and cover with hot water. Allow to boil gently for 20 minutes. Turn into hot bowls and serve at once.

Yes, you read that correctly. This recipe is telling you to heat up a can of chili. If that’s not enough, it’s telling you to boil it unopened. That’s not something we see much in modern cookbooks, is it? (Though I admit to making dulce de leche that way once or twice — you boil a can of sweetened condensed milk for 3 hours. Problem is, if the pan runs dry, your can explodes.)

Many of the other recipes are a bit more complex and don’t require products out of a Gebhardt can, though most of them do require Gebhardt chili powder, which makes sense since that was the company’s flagship product. This week, I made Enchiladas, Mexican Style and Salsa de Chili from this cookbook. I’ll report how those recipes turned out in my next post. In the meantime, however, you might enjoy Gebhardt’s recipe for tacos.

TACOS

Place slices of cooked meat of chicken on a tortilla, spread with pickle relish and fold over, fastening each tacos with two toothpicks so as to hold together. Fry in deep hot fat (390 F.) or toast on a hot griddle, until throughly (sic.) heated and a golden brown in color.

Have ready a salad of shredded lettuce and chopped tomatoes dressed with Gebhardt’s Salad Dressing (page 39). Top each hot tacos with the salad and serve at once.

Note: Tacos is the Mexican’s Sandwich. It is generally thought of as made of roast meat of chicken, either sliced or minced but cheese and sweet fillings are rapidly gaining in popularity. The Mexican enjoys his Tacos and Hot Chocolate as does the American his Doughnuts and Coffee.

An interesting thing about the Gebhardt recipe is how the text uses the word “tacos” — it uses it as a singular noun: “Top each hot tacos with the salad.” Other old cookbooks and magazines from before this time don’t do this. For example, Table Talk, “The American Authority upon Culinary Topics and Fashions of the Table,” discussed Mexican cooking in October, 1913 in the article “Mexican Kitchens and Cooks,” and said: “A taco is the Mexican sandwich; it is a tortilla in which are rolled meat, frijoles, salsa, or nata (curd of boiled milk).”

As a bonus, here’s one more early 20th century recipe for tacos, this one from the Castelar Créche Cook Book, published in Los Angeles in 1922:

TACOS

Put the tortillas in boiling lard and put in tomatoes mashed with onion and bits of garlic, cheese, cooked pork meat, alligator pear, salt and strips of peeled chiles. Roll and cover with a clean tortilla, hold together with toothpick and fry in very little lard, in fact, just enough not to burn. To eat, take off the first tortilla.—Carlota L. Algara.

Next post — The Enchiladas, Mexican Style experiment. Stay tuned.

Mexican Cookery for American Homes

The Asparagus on Toast experiment

Grandma's cookbook: inside the cover (I apologize for the lengthy gap in posts. Real world stuff for the last couple of months has made it very difficult to find time for the cooking, researching, and posting this site deserves. I do have several topics lined up, though, so stay tuned and they’ll be here eventually. Here’s a quick post for the meantime.)

I was going through my grandma’s cookbook from the 1930s, looking for something that would be good with dinner, when the word “asparagus” caught my eye. It’s asparagus season, isn’t it? No better time to experiment with an old recipe that uses it.

Here’s the recipe, with possibly the first time I’ve ever seen the phrase “asparagus water”:

ASPARAGUS ON TOAST

Cut off tough ends of stalks, wash, and cut in inch pieces, keeping tips by themselves. Boil tougher portions in salted water twenty minutes or until tender. Add tips when tougher portions are partly cooked. Drain, pile lightly on buttered toast, which has been moistened with asparagus water, and pour over melted butter, or cover with thin white sauce or tartar sauce.

TARTAR SAUCE FOR THE ASPARAGUS

1/2 cup stiff mayonnaise
2 tablespoons lemon juice
1/4 cup chopped pickle relish
1 teaspoon finely chopped onion
1/8 teaspoon salt

Mix and chill the ingredients and serve with the asparagus.

Though the recipe is another one of the X on toast recipes that seemed more common then than now, the recipe isn’t all that strange, I suppose. I was, however, a bit concerned about the boiled asparagus. Most of the time when I eat asparagus now, it’s steamed, or stir-fried. When I was a kid, I grew up eating canned asparagus, which is kind of mushy. (I liked it anyway, having never had the non-canned version.) I expected boiled asparagus would be closer to the canned texture, and I was not too thrilled about that. But you don’t know until you try, so it was off to the kitchen!

Recipe in progress: tartar sauce

I started with the tartar sauce. I love tartar sauce. As a kid, whenever we went to local burger joints like Dick’s Drive-In or Dag’s, I would always get tartar for my fries. McDonald’s didn’t have tartar, but they were wrong.

As I got older, and more national fast food chains moved into the Seattle-area, the newcomers didn’t offer tartar sauce. Ketchup was everywhere, but it got more and more difficult to find simple tartar sauce for your fries. I have heard that tartar sauce with fries is a “Pacific Northwest thing.” I don’t know. It’s not as common as it used to be, though.

Though I love the stuff, I’ve never actually tried to make it. It’s always been out of a jar. I wasn’t even sure what it was made of. (Or why the tartar sauce from Dick’s is yellow/green.) So I was looking forward to making my own.

The mayonnaise and relish were an issue. The best possible way to make this would be to make homemade mayo and relish to start. I didn’t really have the time or motivation to do that. Also, in the 1930s and earlier, packaged mayo and relish were available, so it would be authentic to use these. Somehow I don’t think my grandma was always making her own mayonnaise. (I used Best Foods mayo, a very old brand.)

Asparagus

I hate sweet relish, but the store had dill relish, so I used that. I added the lemon juice and the salt, and a tiny sprinkle of garlic powder to make up for the onion that I forgot to buy. Then I stirred the mixture, tasted it, and… yum! Even though I didn’t make my own mayo or relish, this tartar sauce was still tastier than the usual jarred tartar sauce. Excellent. I set it aside in the fridge to chill and blend the flavors for a while.

Next, the asparagus. Nothing difficult about this bit—I followed the directions exactly, boiling it in salted water. I boiled the tougher parts for 10 minutes, then added the tips for the rest of the boiling time. The asparagus boiled for maybe 18 minutes total instead of 20, as it seemed perfectly tender at that point. And not mushy.

I buttered toast and moistened it with some of the asparagus water as directed, then spooned on the asparagus and topped it with tartar sauce. (Perhaps a bit more than it needed.) It was tasting time.

Verdict

Hey! It’s good! The asparagus is cooked but not too soft and not mushy in any way. It has a good asparagus flavor. The bread balances it out nicely both in texture and in flavor. The tartar sauce is bright and vinegary on the tongue with a nice bit of dill flavor from the dill relish. (The flavor did intensify after a couple of hours in the fridge, incidentally.)

The combination was really good, and definitely a surprise. I was expecting something edible but not particularly good or interesting, but this was both. It’s also really easy to make. I will make it again.

I still have a bunch of tartar sauce left—I might have to go to Dick’s for some fries…

Teriyaki salmon, asparagus on toast, rice
(Here the asparagus dish is served with some teriyaki salmon and a bit of rice. Unfortunately it got dark before dinnertime, so the lighting wasn’t very good, unlike the dinner, which was excellent.)

A “Japanese” salad from a Russian princess

This 1932 issue of Liberty magazine contained a recipe for a Japanese salad.
Real life stuff has kept me from doing the fun cooking and researching that I want to do. I have a few topics in line but no time to put them together or try the recipes! Augh!

But, have no fear — I do at least have an old recipe for you to enjoy today. This is from the August 27, 1932 issue of Liberty magazine, page 50, in the “To the Ladies!” column by Princess Alexandra Kropotkin (“linguist, traveler, lecturer, and authority on fashion” — she was the London-born daughter of the famous Russian anarchist Peter Alexeyevich Kropotkin).

The column begins with a blurb about actress Anna May Wong, and, after some jokes, anecdotes, and a plug for the book Blonde Interlude by Bourke Lee, ends with a recipe:

“With extreme daredeviltry I give you a Japanese salad on the same page with a Chinese movie star. I may be starting another war, but here goes:

“To begin making this Japanese salad you first peel some potatoes and cook them in meat bouillon with a bay leaf. Dice the potatoes while warm. With every two cups of diced potatoes use one cup of cut-up shrimps, half a cup of diced tongue, and two tablespoons of chopped chives.

“For the dressing use one tablespoon of the hot bouillon in which the potatoes were cooked, one tablespoon of vinegar, two of salad oil, a scant tablespoon of sugar, half a teaspoon of soy sauce, pepper, and a speck of ground mace. Chill well.

“Make a border of the Japanese mixture and fill the center with lettuce leaves sprinkled with French dressing. Decorate with little mounds of chopped beets.”

I am pretty certain I won’t be making this one. It contains two things that are Kryptonite to me: tongue and beets. I once had a traumatic experience when I was invited to dinner with a boyfriend’s parents, and the dinner consisted of boiled, unseasoned tongue sliced in cross-section (the father could not have salt and apparently anything else that makes food taste interesting was off-limits, too) and canned string beans. (The only drink offered was water, which might have been all right if the food was edible, but it was not. I imagine the average prison food is better. It certainly is likely to have more flavor.) So tongue was off the menu for me after that, even when I did still eat beef.

I don’t know how “Japanese” this salad actually is. It strikes me as pretty western, despite the half teaspoon of soy sauce. If this actually is Japanese, I would love to know.

The Malted Milk Cake experiment

This week, after much delay, I finally got around to making the long-awaited Malted Milk Cake. (Recipe is in yesterday’s post at the link.)

The original source cited by the Old Foodie, as I mentioned yesterday, is apparently a 1937 American newspaper article, though I don’t know which newspaper. I have not been able to find it. The earliest Malted Milk Cake recipe I’ve been able to find is here, but though the book is claimed to be a reprint of a 1900 version of A Book of Practical Recipes for the Housewife, it’s not likely to be that old. The “Frozen Cookies” recipe on page 63 refers to a “mechanical refrigerator,” which wouldn’t have been available for household use in 1900. There are versions of this cookbook elsewhere online that are dated in the 1920s and 1930s, such as this one dated 1923. For this experiment, I’ll stick with the Old Foodie’s recipe, but maybe I’ll try the Practical Recipe version another time.

The only change I made to the 1937 recipe was slightly increasing the amount of vanilla.

I mixed the cake batter, and I must say, it was really, really good. (I know I’m not supposed to taste cake batter with raw eggs! But it’s so good!) It was a lovely light brown color and had a gentle chocolate malt flavor.

The cakes baked beautifully. I had to cook them an extra 10 minutes, but my oven temperature often runs a bit low so this wasn’t surprising. The kitchen smelled wonderful. So far, the recipe looked like a success.

Then came the Chocolate Malted Milk Topping. T. W. Barritt at the Culinary Types blog has also made this recipe, and said about the topping in 1920s slang, “The icing is just a bit ornery and doesn’t hit on all sixes.” I agree. The gelatin/evaporated milk/malted milk/sugar combo whips into what looks like a really nice, smooth icing, but it’s definitely ornery, as well as not quite as much as I would have liked to cover the cake.

I even used an old egg beater to whip up the icing. Much quieter than an electric mixer.
When whipped—with an old-fashioned non-electric egg beater, since I didn’t want to wake a sleeping housemate—the icing is smooth and glossy and liquidy. But it nearly immediately sets back up into something gloppy. It is chilled gelatin, after all. It is very difficult to spread it nicely once it does this. In retrospect, I wonder if pouring it over the top of the cake immediately after whipping it to a smooth liquid state would have worked better.

Once assembled, though, the cake looked reasonably nice, as you can see in the photo. I put in in the ol’ ice box (well, “mechanical refrigerator”) to chill.

Verdict

The cake itself is wonderful. It is light, and not too sweet, with a malted chocolate flavor that doesn’t overpower you. It doesn’t taste like a Whopper, for example, which is all overwhelming sweetness and waxy “mockolate.” It’s just got a well-balanced malted milk flavor. I would make the cake again, any time.

The icing is another story. It wasn’t just that it was kind of annoying to work with. I can live with that. But the gelatin was also problematic for textural and flavor reasons. The topping seemed just a little too stiff and rubbery once it set up, and I could taste just the tiniest taste of plain gelatin behind the sugar, malt, and milk flavors. It’s weird—I don’t notice that taste if I have, say, flavored Jell-O. But I definitely taste it here, and that touch of gelatin flavor puts me off the topping just a bit.

Considering the results of the earlier Tomato Jelly Salad experiment, I’m beginning to think that I just have a problem with gelatin in general. It’s a good thing I didn’t grow up in the 1920s or 30s.

Kristen and Jason were also guinea pigs for this recipe. Jason liked it, but thought the cake was slightly dry. He didn’t notice the issues with the icing that I did. Kristen liked the cake, but, like me, did not care for the icing.

Despite the icing not being to my taste, the cake overall is a success. Next time, different icing: something light, to match the lightness of the cake, and without gelatin. Last week I made a lemon ice box cake that had frosting made from whipped cream, sweetened condensed milk, and lemon juice. It was light and delicious. I wonder how something like that, with malt and chocolate substituted for the lemon, would work with this cake.

Chocolate Malted Milk Cake

An elusive ingredient found, it’s time to bake

Photo by Roadsidepictures.
Long time readers may recall that the main inspiration for this blog was my search for the “Gold-n-Sno” cake mentioned in Finding Betty Crocker: The Secret Life of America’s First Lady of Food.

The Gold-N-Sno cake seems to have been a cake that was mostly made by bakeries, not by home bakers. When bakeries advertised the Gold-N-Sno cake, they frequently listed another cake that caught my eye as well… a Malted Milk Cake. I love the flavor of chocolate malted milk. Chocolate malts, Maltesers (Whoppers may substitute in a pinch, but Maltesers are so much better), whatever. I love it. And it’s a flavor that can be hard to find sometimes.

I went looking for a malted milk cake recipe, and soon found a recipe at The Old Foodie, who says it’s from an American newspaper article in 1937.

Chocolate Malted Milk Cake.
2 ¼ cups cake flour
1 cup chocolate malted milk [powder]
3 teaspoons tartrate baking powder OR:
2 ¼ teaspoons double-action baking powder
¼ teaspoon salt
½ cup soft shortening
1 cup sugar
2 whole eggs
1 ½ teaspoons vanilla
½ cup evaporated milk
½ cup water.

Light oven and set at moderate (350F) temperature. Grease and flour two 9 inch cake pans. Sift before measuring the cake flour and re-sift with the chocolate malted milk, baking powder and salt. Cream together until light and fluffy the shortening and sugar. Beat in vigorously the egg and vanilla.
Add the flour mixture alternately with the evaporated milk diluted with water. Begin and end with the flour mixture, beating until smooth after each addition. Pour into prepared pans. Bake 25 minutes in moderate oven (350F) or until cakes shrink from the sides of pans. When cool, put together with;

Chocolate Malted Milk Topping.
1 ½ teaspoons plain gelatin
2 tablespoons cold water
1 cup evaporated milk
6 tablespoons chocolate malted milk [powder]
4 tablespoons powdered sugar
Soak the gelatin in the cold water for five minutes. Scald [the evaporated milk] over boiling water. Add soaked gelatin and stir until dissolved. Pour into bowl or freezing tray of mechanical refrigerator and chill until icy cold. Whip until stiff with rotary beater or electric mixer at high speed. Fold in the malted milk and sugar. Spread between and on top of cake. Chill.

No problem. I figured I’d just run down to the store and get some chocolate malted milk.

Oops. That was harder than expected. Sometime in the last few years, most, if not all, of the grocery stores in Seattle that used to carry chocolate malted milk powder have stopped. Most of them still have the plain malted milk, but not the chocolate. The only store that carried it, as far as I could find, was the Amazon Fresh delivery service—but they didn’t serve our area at the time.

My friend Amie stepped in with an offer to order the malted milk from Amazon Fresh for me. With the chocolate malted milk finally at hand, I would have made the cake. By then, however, my kitchen was in a thousand pieces and in no condition for cake baking.

So here we are, nearly a year later, and the time has finally come for the malted milk cake. (And since then, Amazon Fresh has stopped carrying the malted milk as well! Good thing I saved it for this cake.) Stay tuned for the results of this experiment.

The New Art of cooking, 1930s-style

It’s 1934, and we have a new GE refrigerator, or maybe we’re thinking of another new kitchen appliance. What will we do with our wonderful new electric kitchen helpers, and what should our new kitchen look like?

Time to browse The New Art:

The New Art cookbook, 1934

This cookbook/wish book showcased kitchens with GE appliances, and included recipes. It includes the recipes from the earlier Silent Hostess cookbook, along with other recipes to play to the strengths of other GE appliances besides the refrigerators.

First, they give you a few new 1934 model kitchens to drool over:

The New Art cookbook, 1934: Model kitchen

The New Art cookbook, 1934: Model "Provincial" kitchen
Read More

Found in the back of a 1930 cookbook

Recipe pinned in the "Silent Hostess" cookbook.

This clipping was pinned in the back of my 1930 Silent Hostess Treasure Book cookbook.

Lemon Pudding

4 eggs
1 1/2 cups of sugar
2 cups of sweet milk
2 tablespoons of flour
2 tablespoons of butter
2 lemons

Mix the four eggs, (except the whites of two which should be reserved for a meringue) with the juice of the two lemons and the grated rind of one of them, the sugar, and the butter, melted. Blend the flour with two tablespoons of the milk and gradually add the rest of the milk to it, stirring as you add. Combine the two mixtures, (egg and milk) and lightly beat them to blend. Pour into a well buttered baking dish and bake half an hour in a moderate oven. Beat the whites of the two eggs stuff, beat in the four tablespoons of sugar, flavor with a little of the grated rind of lemon and heap on the top of the pudding after it has baked a half hour. Put back in the oven, reduce the heat to a very moderate oven and brown the meringue delicately.

Tomorrow: Vegetable Loaf.

The clipping is undated, and there is no indication as to the source, but the references to a “moderate” and “very moderate” oven (and to a “quick oven” in the recipe that follows) mark it as being relatively old. A moderate oven is about 350 degrees F. Very moderate is probably about 325 (most conversion scales don’t list “very moderate”, but the recipe does say to “reduce the heat”). A quick oven is about 375-400 degrees. You can find a conversion chart for these old-fashioned temperatures (and measurements) here.

A baked pudding with meringue isn’t entirely unheard of these days (particularly as a pie filling), but I bet most folks who make pudding at home make it from a box. Which is an entirely different sort of pudding from this one. (And, hopefully, a different sort from the pudding discussed in “Poisoned By a Lemon Pudding: Narrow Escape of a Family of Six at Westwood, O.“, an 1890 article in the Chicago Daily Tribune. Unfortunately, the Trib wants $3.95 for access to the article, so for now, the cause of the family’s lemon pudding poisoning will remain a mystery.)

At the bottom of the clipping is a “Requested Recipes” feature, written in a charmingly-dated style:

Requested Recipes

“BISCUITS”: Milk and water biscuits you say this recipe is to be. But even more important than that would have been the information as to whether they were “raised” or “baking powder” biscuits. We shall chance the latter: 2 cups of flour, 4 teaspoons of baking powder, 1 teaspoon of salt, 2 tablespoons of shortening, and 3/4 cup of milk and water mixed. Sift the flour, baking powder and salt; genetly rub the shortening into these with the tops of the fingers, then stir in the milk. Pat or roll on a lightly floured board. Cut with a round cutter and place on a buttered pan or baking sheet. Prick the top with a fork and bake about fifteen minutes in a quick oven.–(FOR MRS. S.)

The back of the clipping, unfortunately, does not tell us where or when it came from. It is part of an ad for a rayon bedspread, shown on a very old-style bed. My guess is that it is contemporary with the cookbook itself. Rayon was already known and used by 1930.

The Tomato Jelly Salad experiment

This weekend, the time came to make the previously-mentioned Tomato Jelly Salad, a tomato aspic dish that is in the suggested Thanksgiving menu in the Silent Hostess cookbook from 1930.

The tomato aspic experiment: getting started

Here is the recipe, from page 50 of the Silent Hostess Treasure Book. The Tomato Aspic is the basis of the salad, so I’ll list it first:

Tomato Aspic
2 tablespoons gelatin
1/4 cup cold water
1/2 cup boiling water
4 cups tomatoes, fresh or canned
1 tablespoon chopped onion
1/2 teaspoon celery seed
2 or 3 whole cloves
1 teaspoon salt
1 teaspoon sugar
2 teaspoons lemon juice

Soak the gelatin in cold water and dissolve in boiling water. Cook the tomatoes, onions, celery seed, cloves, salt and sugar for fifteen minutes. Strain through fine strainer or cheese-cloth; add lemon juice and dissolved gelatin. This may be molded at once or it may be kept in covered jar in refrigerator Cabinet until needed. To use, take out what is wanted and melt over hot water. Suggestions for several variations follow.

Tomato Jelly Salad
Fill individual molds which have been dipped in cold water with Tomato Aspic. Chill until firm. Unmold on crisp lettuce and serve with mayonnaise dressing.

And on page 57, the dressing:

Mayonnaise dressing
2 egg yolks
1/4 cup vinegar
1/8 teaspoon pepper
1 teaspoon salt
1 pint salad oil

Beat egg yolks and add few drops of vinegar. Drop oil, drop by drop, into egg mixture until one-fourth cup is used. Then gradually increase the amount of oil added, beating constantly. As mixture thickens , add the rest of the vinegar a little at a time, Add salt. Lemon juice may be used in place of vinegar, if preferred.

I got canned tomatoes, as at this time of year, it’s likely that a homemaker in 1930’s Seattle wouldn’t have access to fresh tomatoes. I thought about adding some Tabasco or something else to give it some spice, but decided it was better to follow the recipe as is for testing purposes. After cooking the mixture of tomatoes and spices, I drained the tomato puree, mixed the juice with gelatin, and poured it into some cups to mold.

The tomato aspic experiment: Straining the tomato mixture The tomato aspic experiment: In the molds, ready to go in the fridge

Then the cups went into the refrigerator to chill. A bit later, Kristen and I made the mayonnaise. Living dangerously, we decided to risk an uncooked egg mayo. (The eggs were, at least, organic and well-washed.) Making mayonnaise is slow (dripping the oil in, drop by drop) but the results are pretty good. The recipe above probably includes too much salt, though.

Then, it was time to eat the Tomato Jelly Salad, served on a lettuce leaf with a jaunty cap of mayonnaise. (Unfortunately, we accidentally froze our lettuce, so the lettuce leaf itself was a little bit icky. It worked ok for photos, though.)

The tomato aspic experiment:

Verdict:

I have an odd ambivalence about this. It doesn’t exactly taste bad — it tastes like V-8 or tomato juice, and I like V-8. But for some reason I don’t really want to make this or eat it again. I think it’s got to be a textural thing. V-8 is great, but gelatinous V-8? Well, I’ve never developed a taste for it. It feels odd to me. I don’t hate this, or even exactly dislike it, and the flavor is OK, as I said. It’s just not really likable.

Kristen tasted it, and did not like it. Jason suggested that it might be better sliced on crackers. Perhaps. The next morning, he ate it in cubes mixed with fried egg, and said “ehhh, I probably won’t eat any more.” Jesse tried it, and his response was about the same as mine.

So, the mystery remains: why did gelatin salads take US culinary habits by storm in the early 20th Century? Based on the evidence of the Tomato Jelly Salad, we can’t yet imagine why. But we will experiment further.
Read More